

Pickled Raw Papaya- tasty crispy version
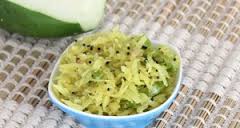 Raw papaya pickle is a quick and interesting recipe. Raw papaya pickle is a good appetizer and good enough for digestion too. You can relish the taste as a starter too. It is not spicy and can be enjoyed by children too.
The papaya crop is abundant and at times you get blessings from your neighbours kitchen garden as it their first harvest. To sum up you will have several fruits at the same time and you will be in a dilemma to consume them as it is your favourite fruit too.
Keep all your worries aside as there are many ways you can utilize papaya .For your information tutti frutti used in cakes and breads are made from raw papaya . This was news for me too. However let’s come back to the recipe that will take only 10 minutes for preparation.
Ingredients for Pickled Raw Papaya
- Raw papaya : 2 cups (diced)
- Green chilly / Bird’s eye chilly : 2 nos
- Mustard seeds:2 tspn (crushed)
- Salt: 1 tspn (as per taste)
- Vinegar: 1/3 cup
- Curry leaves:1 stem ( optional)
- Water: 2 cups
Procedure for preparing Pickled Raw Papaya
Method:
- Peel and wash the raw papaya. Cut the raw papaya into small cubes.
- In a small bowl heat 2 cups of water. Add the diced raw papaya when the water comes to a boil.
- Put off the flame. After 2 minutes drain the water completely. The papaya is semi cooked now.
- Add crushed mustard, salt, chopped green chilly or bird’s eye chilly, vinegar and chopped curry leaves to the bowl containing drained papaya. Mix all the ingredients.
- Transfer the ingredients into a glass jar and leave it overnight. The steamed papayas will absorb the salt, chilly and vinegar.
- The crushed mustard only enhances the taste of the pickle.
- This raw papaya pickle is a great alternative during meal time. Try this and do not miss to reply with feedback.
Papaya has numerous health benefits. Grab the opportunity to be healthy by incorporating healthy dishes and a great lifestyle too.
You can try variations in this recipe by adding chilli powder, other vegetables. Try this recipe and enjoy easy and healthy cooking. For more healthy and tasty recipes visit our Facebook page and Google+ page.
Hot and Spicy Chicken Pepper Masala
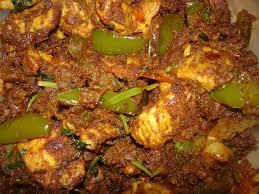 Hot and Spicy Chicken Pepper masala is a popular dish at home especially during winter and rainy days and when the family is in a mood for eating out. The dish is easy to prepare, you can become an expert and prepare this dish when you have guests at home too.
Spicy Chicken Pepper masala can be made a little less hot and spicy by reducing the pepper powder quantity. The dish looks attractive and is a great hit among family too. Try this recipe and surprise your family with exquisite treats.
Let’s move on to the recipe and understand the requirements.
Ingredients for Hot and Spicy Chicken Pepper Masala
- Chicken : 500 g (preferably use skinless and boneless chicken-thigh)
- Green Ball pepper/ Capsicum: ½ cup (diced)
- Onion : 1.5 cup (chopped)
- Tomato: 1 cup ( chopped)
- Ginger: 1 tsp (finely chopped)
- Garlic: 4 to 5 cloves (finely chopped)
- Green chillies: 2 nos ( finely chopped)
- Curry leaves: 2 sprigs
- Pepper powder: 1.5 tsp (adjust to your taste)
- Turmeric powder: ¼ tsp
- Chilli powder: ½ tsp
- Coriander powder: 1 tsp
- Cumin powder: ½ tsp
- Garam Masala Powder: ¼ tsp
- Fennel seeds / Saunf: ¼ tsp
- Coriander leaves / Cilantro: 1 bunch(finely chopped)
- Oil: 2 tbsp
- Salt: to taste
- Lime: ½ no.
Procedure for preparing Hot and Spicy Chicken Pepper Masala
Method:
- Cut and wash chicken thoroughly, add juice of half a lemon and rinse the pieces well. The benefit of adding lime is it will take off the smell and your pieces will look clean. Drain water and rinse once more with fresh water.
- Drain water completely through a sieve and transfer the chicken pieces to a bowl.
- Add turmeric powder and keep aside.
- Heat 1 tbsp of oil in a kadai/ pan, add chopped capsicum and stir for 2 minutes along with ¼ tsp pepper and ¼ tsp salt. When mixed transfer contents to a plate.
- Ensure the pepper is coarsely grinded for this dish.
- Heat 1 tbsp of oil in the kadai add saunf, when it splutters add curry leaves, chopped garlic, ginger and green chillies. Saute on a medium flame, add 1 tsp pepper powder and allow it to sizzle in the heat.
- Now add onions, sprinkle little salt and sauté till they are light golden brown. This will take approx 4 to 5 mins.
- To this add chopped tomatoes and stir till it becomes mushy.
- This is the stage when you need to add all the dry powders and mix on low flame. If you want to have gravy sprinkle little water.
- To this base add chicken pieces and stir fry for another 2 minutes and cook covered in medium heat until the chicken pieces gets cooked. The pieces should become soft and tender.
- At this stage add roasted capsicum kept aside in a plate, after stirring for 2 mins add balance pepper powder and mix all the contents in the kadai.
- Add the chopped coriander leaves and switch off the flame.
Your hot and Spicy Chicken pepper masala is ready to serve with hot rice, chapathis, pulka, side dish for biryani , vegetable pulao too.
You can try variations in this recipe by adding potato, mushroom, paneer /cottage cheese. The vegans can exclude chicken and add the above vegetables and I’m sure you are going to try the vegan preparation. Do not miss to give us an update.
Try this recipe and enjoy easy and healthy cooking. For more healthy and tasty recipes visit our Facebook page and Google+ page.
Quick Spicy snack- Bread Paneer Rolls
January 22, 2015 by admin
Filed under How to make...for beginners, Snacks & Salads
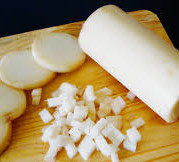
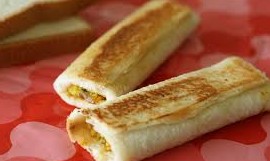 Bread Paneer rolls are a great snack and a tasty appetizer for high tea also called afternoon tea. A quick and easy recipe. The ingredients are all available at home. It is a matter of preparing the snack. Paneer is Indian cottage cheese or Chena, you can easily make it at home.
Involve your kids for the preparation and they will definitely nourish the snack. A nice way to learn new skills and preparing in emergencies.
Most of the dishes that is prepared at home was learnt by merely watching my mom and aunt doing the home tasks. Actually about two decades back there was less opportunity to watch cooking shows on Television. Now with the zoom of technology and several channels emerging on television you get to see several chefs and in case you missed the schedule, you can watch the same recipe thru’ a video or blog.
This opportunity was not there then. However we made use of our memory or at the most write down the recipe for future reference. I still continue that practice of jotting down in the Recipes diary.
Let’s move on to the recipe and understand the requirements.
Ingredients for Bread Paneer Rolls
- Bread slices : 6 nos
- Shredded paneer / Cottage cheese: 1 cup
- Green chilly: 1 tsp (finely chopped)
- Jeera / Cumin seeds: ¼ tsp
- Garam masala powder: ¼ tsp
- Coriander leaves: 2 tsp (finely chopped)
- Ginger : 1 tsp ( finely chopped)
- Pepper powder: a pinch
- Milk: 2-3 tsp
- Salt: to taste
- Ghee: 2 tbspn
- Water: ½ cup
- Butter-2 tbsp ( to apply on roll during heating)
This recipe will make 6 bread paneer rolls.
Procedure for preparing Bread Paneer Rolls
Method:
- In a small bowl add shredded paneer, chopped green chillies, jeera, garam masala, coriander leaves, chopped ginger, salt and mix well. Filling is ready.
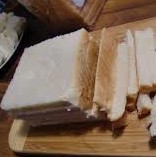
- Trim the edges of the bread slices. Preferably use sandwich bread.
- Flatten each bread slice using a rolling pin.
- Spread a thin layer of the filling mix onto the flat bread slice. Sprinkle water to make bread moist and also roll it into a cylinder, making sure the edges are sealed.
- When the heating pan or skillet is ready butter all around the roll and grill on medium heat. You should keep turning to ensure even browning all around the bread paneer roll.
- Serve them with tomato ketchup. You can cut them into halves and make it even more tempting for the kids.
Hey get going…try making some bread paneer rolls.
You can try variations in this recipe by adding mashed boiled potato in place of paneer. Try this recipe and enjoy easy and healthy cooking. For more healthy and tasty recipes visit our Facebook page and Google+ page.
Instant recipe for Khatta Meetha Chutney
November 4, 2014 by admin
Filed under Chutney varieties
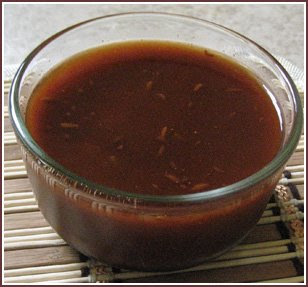 Khatta meetha chutney is a mandatory ingredient that adds flavor to the snack items. Khatta meetha chutney is used in popular recipes like Dahi Vada, Pani Puri, Bhel puri, Ragada chaat, Samosa, Chilli bajji, etc. We do not get this chutney ready to use in shops, therefore this recipe is critical to make tasty snacks.
Children love to eat snacks from the stalls placed by vendors and considering the risk to health, I prefer to prepare snacks at home and serve to my kids. I’m free of stress with the thought of them getting sick.
Ingredients for Khatta Meetha Chutney
- Tamarind: 2 balls ( lemon sized)
- Jaggery / Gur / Sharkkara: 3 tbspn (grated)
- Jeera: ¼ tspn
- Chilli powder: ½ tsp
- Cooking oil: 2 tbspn
- Salt:1/4 tsp
- Water :1/3 cup (to soak tamarind and make pulp)
Procedure for preparing Khatta Meetha Chutney
Method:
- Soak tamarind in water for an hour. Extract thick pulp and filter the same to remove shreds.
- Grate jaggery and keep aside.
- In a shallow pan heat oil and add jeera. When it splutters, lower flame and add chilli powder.
- To this base add tamarind pulp, grated jaggery, salt and mix well.
- Close the pan with a lid and allow this mixture to boil on a low flame for 10 to 15 mins until it thickens.
- The khatta meetha chutney is ready and can be used for your snack preparations.
The chutney can be refrigerated for about 3 months for further use. Store in an air tight container.
Similarly you can try the dates chutney that can used for dosa, chapathis, enjoyed by children for its sweet and sour taste.
Making snacks like pani puri, dahi vada call for preparation of several items that are mainly basic ingredients for the snacks You can save time by preparing the chutney in advance and go ahead planning the others just in time.
Hope you enjoyed the instant recipe for Khatta Meetha Chutney. Try this recipe and enjoy healthy cooking. For more healthy and tasty recipes visit our Facebook page and Google+ page.
Aval Nanachathu- Sweet Poha with Coconut
October 30, 2014 by admin
Filed under Breakfast recipes, Rice varieties, Snacks & Salads
Aval nanachatha is an instant recipe ideal for breakfast and evening snacks. Sweet Poha with coconut is served during travel too as it is convenient to serve and eat too. Small banana is a good combination to have along with aval nanachatha, you can have it otherwise too.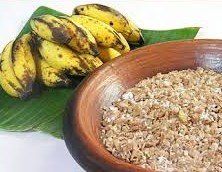
Aval is also called Poha in North India, Flattened rice, Atukulu in Telugu. Poha is made with a spicy taste in North India. Aval nanachatha itself means wetting or dampen the flakes. Therefore you need to lightly sprinkle water/ coconut water to make it absorb the taste of jaggery and fresh coconut.
In some parts of kerala, milk is used to prepare aval nanachatha, I love the taste of black coffee in aval nanachatha.
Ingredients for Aval Nanachatha- Sweet Poha with coconut
- Flattened rice/ Aval/ Poha: 3 cups
- Fresh coconut : 1 cup ( grated)
- Jaggery: 1 cup ( grated)
- Black coffee / Coconut water: 1 cup ( at room temp)
- Elaichi / Cardamom: 2 nos ( powdered)
Procedure for preparing Aval Nanachatha- Sweet Poha with coconut:
Method:
- Sift the flattened rice to remove any small powdered particles.
- In a wide vessel add flattened rice, grated coconut, grated jaggery, powdered cardamom and mix well.
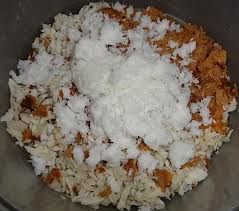
- Sprinkle water / coconut water or black coffee (kattan kapi) and mix the ingredients. The mix should not become soggy, it should remain as sweetened flakes.
- Mix and serve. People do serve this with small banana.Prepare this instantly and serve .The longer you retain it will become soggy and the crispness of atuluku will go away.
- If you are using the kerala poha i.e thick and red variety you will have to sprinkle lukewarm water / black coffee / milk.
My mom used to chop banana as slices and serve aval nanachatha when we were kids. Now I follow that practice for my kids.
The combination of fresh coconut and grated jaggery is loved by kids and elders and usually my kids will grab from the plate immediately after they get to know something new is being prepared in the kitchen. They will make multiple rounds to see the progress. Their senses for smell is perfect (as Madhuri Dixit says in Jhalak Dikla jaa-TV prog) and they will come sniffing from their respective study rooms more so, if they are studying. I repeat this because you will not get them during play time or TV time.
You can try this recipe with sugar too if jaggery is not available. This is an easily digestible, healthy snack and can be made in no time. Give a try for evening snacks today.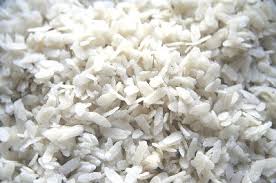
I’m planning to prepare aval vilayichatha some time shortly. There are plenty of recipes with aval : Atukulu laddoo, Fried Atukulu and so on.
In winters you can have it with hot chukka kapi and brighten your mood.
Try this recipe and enjoy healthy cooking. For more healthy and tasty recipes visit our Facebook page and Google+ page
Enjoy Combo Offer-Hot Steaming Tapioca with Bird’s Eye Chilli Chutney
October 9, 2014 by admin
Filed under Breakfast recipes, Chutney varieties, Snacks & Salads
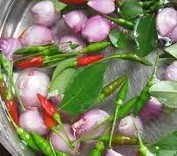
 Today I’m sharing a recipe of Kappa Puzhungiyathu along with Kanthari Mulaku Chammanthi. It is a great combination especially when you are having a great appetite. It boosts energy levels. I’m sure any keralite staying away from home will long to have a bite of this delicious feast. The images are so tempting that I would like to grab a piece or two from the banana leaf spread.
The back ground was that I reached home tired after work and was in no mood to cook dinner. I was relaxing after a cup of tea and my hubby comes in with a big bag of kerala store items. As we are away from Kerala, he longs for Friday -basic reason to collect the fresh stock of ethakka (kerala banana) ,kappa (tapioca), Chena (elephant foot), Kaachil (Purple Yam), Kochu ulli (Shallots), Kanthari Mulakka (bird’s eye chilies),Coconuts, masala powders , etc..
The visual image of Kappa Puzhungiyathu with green chilli chutney combination was so tempting that I finalized on the menu for dinner. This is a quick dish and relished too bringing in nostalgic memories back home. Though my younger son was fussy over the change in menu (pulka regularly), he was willing to adjust with fish curry.
Therefore started to prepare the menu finalized for dinner: Kappa Puzhungiyathu along with Kanthari Mulaku Chammanthi.
Ingredients for Kappa Puzhungiyathu – Boiled Tapioca- Yuca- Cassava
- Kappa-Tapioca- Yuca- Cassava : 2 large roots
- Water: as required to cook
- Salt: as per taste
Procedure for preparing Kappa Puzhungiyathu – Boiled Tapioca:
Method:
- Cut the kappa-tapioca into 4 cm length slices.Peel the skin , it will come off as a thick layer.
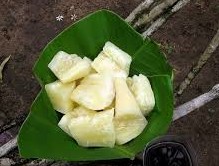
- Slice these round pieces lengthwise into 2 or 4 pieces to allow easy cooking.
- Transfer the cut pieces into a large shallow pan containing water. Wash the immersed kappa thoroughly to remove any impurities and sand particles.
- Pour water till the level of chopped kappa-tapioca and cover the vessel with a lid. Allow this to boil. After 4 to 5 minutes of boiling, drain the water completely. This step is essential to remove the katta or starch.
- Now pour the same amount of fresh water and allow the kappa-tapioca to boil. Add salt as required and cook for 10 to 12 minutes until it turns soft and tender.
- Put off the flame. Drain the water completely and keep aside.
- Serve it steaming hot with kanthari Mulaku Chammanthi/ Chicken curry with lots of gravy, Fish curry-Kerala style.
Ingredients for Kanthari Mulaku Chammanthi-Bird’s Eye Chiili Chutney
- Kanthari Mulaku / Bird’s eye chilli: 20 nos (optional green chilli-4 nos)
- Shallots/Pearl Onion/Kochulli: 12 nos
- Tamarind extract: soak lime sized tamarind and extract thick pulp
- Salt: as per taste
- Coconut oil: 3 tspn
- Curry leaves-shred 4 to 5 leaves
Procedure for preparing Kanthari Mulaku Chammanthi- Green chilli dip:
Method:
- In a mixer ,pulse kanthari Mulaka/ green chilli, shallots, curry leaves 2 or 3 times. You can also use the arakalla- motor and pestle – ideal for taste.
- Green chilli is an option for kanthari Mulaka, like wise use onion for shallots.
- Transfer the mixture into a serving bowl. Add salt ,tamarind extract and coconut oil and mix well.
- Ready to serve with steaming kappa puzhingiyatha.
This is a quick fix menu and can be prepared with ease. You can prepare the green chilli dip when the kappa is boiling. Maximum time will be 25 to 30 minutes for preparing this menu.
Chicken curry with gravy, Fish curry are great combinations. An ideal recipe for breakfast, evening snacks and dinner too.
We enjoyed this sumptuous dinner. Go ahead and give it a try…
Try this recipe and enjoy healthy cooking. For more healthy and tasty recipes visit our Facebook page and Google+ page
Prepare Ladies finger-Okra pachadi in the authentic Kerala style
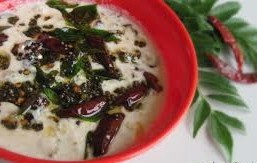 Ladies finger pachadi is a popular dish during a sadhya or special occasions in Kerala. Pachadi is a mandatory dish during sadhya on occasions like Onam and Vishu. Pachadi / Kichadi is made with ash gourd, beetroot, cucumber etc. Lichadi / pachadi looks like a raitha mixed with mustard seeds.
The milky white color of pachadi / kichadi is very attractive and is healthy too. Ladies finger pachadi / Okra pachadi is easy to cook and can be included on your menu especially on days planned for vegetarian meals.
My son likes the blend of colors that kichadi / pachadi generates especially when made with beetroot and cucumber.
Ingredients for Ladies finger pachadi:
Ladies finger / Okra/ Vendakka : 15 nos
Green chillies : 2 nos
Coconut: ½ cup grated
Yoghurt / Thick curd: 1 cup
Cooking Oil : 4 tbpn
Mustard seeds: 2 tsp
Jeera: ½ tsp
Garlic-3 slices
Curry leaves: few
Dry red chilly: 2 nos
Salt: to taste
Procedure for preparing Ladies finger/ Vendakka pachadi:
Method:
· Wash the ladies finger / vendakka and pat dry. Cut okra into round slices, cut them as thin as possible.
· Heat 2 tablespoon of oil in a pan and fry them until crisp. Ensure they do not get burnt.
· Grind grated coconut along with a pinch of jeera and 3 slices of garlic.
· Powder mustard coarsely.
· In a bowl mix coconut paste, thick curd, fried ladies finger, mustard coarse powder, salt as required and mix well. Heat the base for a minute.
· Heat the remaining oil in a pan. Do seasoning with mustard, jeera, dry red chilli, curry leaves and add into the bowl.
· Vendakka pachadi/Okra kichadi is ready to serve with hot rice or rotis too.
This is the authentic way of cooking vendakka pachadi. Your family will appreciate your original cooking bringing nostalgic memories of grandma’s cooking. The family will is gonna relish your cooking.
Try this recipe and enjoy healthy cooking. For more healthy and tasty recipes visit ourFacebook page and Google+ page
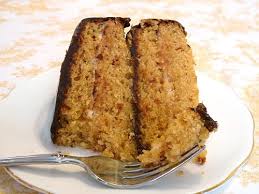
Bake a Sponge cake with Caramelized sugar
August 25, 2014 by admin
Filed under Cakes-Baking, How to make...for beginners
 Cakes are universally popular during birthdays and special occasions at home. We have a practice of baking cake additionally from the home made butter. The butter is fresh and ideal for making soft and spongy cakes.
Cake baking is no great skill. The secret of baking cake successfully lies with the proportions of the ingredients. Any mismatch will make the cake become a disaster. Therefore recommend you to go by weight and not measures for basic ingredients.
Cake baking process is no rocket science but basic awareness of the role for each of the ingredients during the basic process needs understanding for the users.
You can bake cakes in various different ways by experimenting with different fruits and flavors. Today we shall go thru the recipe of baking a sponge cake with caramelized sugar.
Ingredients for Sponge cake with Caramelized Sugar:
- All-purpose flour /Maida: 200 gm
- Butter (home made or saltless variety): 200 gm
- Sugar:175 gm+ 25 gm for caramelization
- Eggs: 200 gm
- Cardamom / Elaichi: 6 nos
- Patta : 1 inch piece
- Vanilla essence: 1.5 tsp
- Cashewnut / Kaaju: 10 nos
- Raisins / Kismis: 10 nos
- Baking powder: 1+1/2 tsp
Procedure for preparing Sponge cake with Caramelized Sugar :
Method:
- Sieve maida and baking powder together for 2 times, this will ensure uniform mixing. Powder sugar in a mixer. Transfer in a mixing bowl.
- Eggs also needs to be weighed, you can only use the white of the egg to balance the weight. Beat eggs in the same mixer.
- Add butter ( kept at room temperature) to the powdered sugar in the mixing bowl. Mix well with a plastic ladle or with your hand. After 3 to 4 mins of constant mixing add beaten eggs. Mix all the ingredients again for 3 to 4 mins.
- To this base add maida and mix vigorously to remove any lumps of unmixed flour. Add the caramelized sugar and thoroughly mix the batter.
- After 5 mins add cashew,raisins and vanilla essence. It is ready to transfer into the baking oven.Retain a few for decorating the cake.
- Meanwhile grease the baking pan with butter. Sprinkle some dry maida onto the baking pan to form a thin layer of maida. Now pour the cake batter into the pan.Decorate with cashew and raisin on top.
- If you are using the micro oven, preheat oven to 200 deg C for 10mins. Bake in preheated oven at 200 degree C for 10 mins, then reduce temperature to 180 deg C and bake it for 30-35 mins.
- Take a tooth pick and prick the cake till the base to check whether it comes out clean or not. If the mixture is still sticky, then bake it for another 10 minutes. Check it again and turn off the oven.
- Remove pan from the oven and cool for about 5 minutes before flipping it over onto a platter. Use a butter knife to lightly run along the edges of the cake; make sure that the edges are all loose before you flip it.
- I use the cake oven with a sand tray accessory at the bottom. I heat the sand tray for 4 to 5 mins and then decrease the flame of the gas stove. I place the cake pan above the sand tray. The oven has to be kept at low flame for 25 mins.
- Sponge Cake with caramelized sugar is ready. Let it cool down for a while and then separate it from the pan with the help of a knife. Cut the cake in the shapes you desire and serve it.
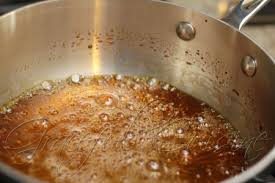
- Pre-work: You need to caramelize sugar on the pan. Heat sugar on a thick bottomed pan. When it melts and become liquid keep stirring. It will start changing color and when it becomes dark brown you can add a few spoons of water and put off the flame. The other option will be to cool caramelized sugar on a tray of ice.
You will receive a lot of appreciation for the baked cake. The aroma of fresh cake baking will be all over your house and out in the open air too.
My kids will visit the kitchen often mainly because of the aroma and the curiosity to know what other varieties I’m actually attempting that day.
Try this recipe and enjoy healthy cooking. For more tasty recipes visit our Facebook page and Google+ page.
My experiences in the kitchen-Part 2
July 28, 2014 by admin
Filed under How to make...for beginners, Kitchen tips & tricks
 For a beginner in the kitchen all the activities will feel like a huge task. As you experience with cooking several dishes you start gaining confidence and the tasks start looking simpler and less complicated. Here are a few tips from my experiences in the kitchen in continuation to the previous posts that was shared.
Watch out for the tips and tricks that has to be managed while working in the kitchen.
Cutting or chopping vegetables
- Sharpen your knife with a stone. Soak the stone in water and then rub the knife in an angle to get a better finish. Avoid the electric sharpener as much metal will be rubbed off in the process.

- To avoid crying while cutting onions refrigerate and then cut. If you have not refrigerated then place an onion on the tip of the knife you use to cut the onion. No shedding of tears.
- To avoid itching after cutting elephant foot take a small piece and place it on flame using a pincer. Your itching will minimize and gradually stop.
- Vara pindi / Banana stem dish is tasty. While chopping banana stem you need to remove the fibers that is present between the stem. Ideal method cut the inner white stem in ½ inch circular pieces. While segregating you will observe long hairy threads along with the circular piece. Roll this hairy threads on your finger and proceed to cut another circular slice. This way unwanted threads can be removed and finally hold 4 to 5 circular slices and chop them fine.
- Do not throw away the water in which rice is washed prior to cooking. Raw banana , banana stem , banana flower chopped for torran i.e a dry vegetable dish: can be soaked in this water. This will avoid becoming black. Drain water and squeeze the ingredients well prior to cooking.
- Add chopped Potato, brinjal (egg plant) ,elephant foot in water to avoid blackening. The actual color of the vegetable is retained.
- To keep the green chillies fresh for a longer time, remove the stems before storing.
- Wash and dry ladies finger prior to chopping. This will relieve you of stickiness.
- Reduce bitterness of Karela. Slit karelas ( bitter gourd) length wise and apply a mixture of salt. Keep aside for ½ hour and then cook.
Cooking tips:
- While boiling pasta and noodles, use some oil in the water to avoid sticking. When the noodles are boiled, drain all the hot water and then add cold water. This way all the noodles will get separated.
- To prevent the growth of fungus in pickles, burn a small grain of asafoetida over a burning coal and invert the empty pickle jar for some time before putting pickles in the jar.
- Before cooking cauliflower florets soak them in warm salted water for a while to get rid of any tiny insects that may be present deep inside the florets and not visible to the eye.
- A little rice flour added to bhajia batter will not only make the bhajias crisper but also less oily.
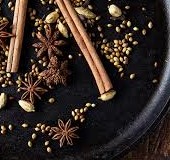
- Always warm dry spices like cumin seeds, cardamom, cloves, etc. on a griddle before powdering. They will grind faster and the powder will be finer.
- If you want the onion to change color during sautéing on a low flame, add ½ tsp of sugar and you will see a coloration appear .
Safety tips:
- If you are not using a chopping board, then it is advised to use finger gloves while cutting vegetables.

- Fry the fat of chicken in a kadai on a low flame. The oil that is collected can be stored in a clean and dry bottle. This oil is ideal to apply on minor burns in the kitchen. It gives cooling effect and heals faster too. Shelf life: 3 years
General tips:
- If the lemon or lime is hard, put it in warm water for 5-10 minutes to make it easier for squeeze. Also lemon can be used while washing chicken, fish, meat to remove that raw blood smell, cleansing properties too.
- To remove fish and meat odor from your hands rub with lemon rind.
- Always keep dough (atta/ maida flour) covered with a moist cloth to avoid a dry crust from forming on it.
- Crust removed from bread for making sandwiches etc., can be sun dried or oven dried and powdered in a mixer to form fine breadcrumbs. Refrigerate and use as required. You can make tikkis or use in cutlets.
- Commonly observed that jam bottle cap does not open as it is seal locked. Make a small dent on the cap with a knife to remove the vacuum and you will be able to open the cap.
- Soak and cook dhals ,you can save cooking gas. For more tips on gas saving methods check out- Great tips to save LPG in your kitchen.
- Keep a scissor, bottle opener, stone for sharpening knives handy in the kitchen to avoid delays.
An organized kitchen is the key to work efficiently. Once a week organize the racks to ensure you get your containers and spoons on time.
Related reading:
My experiences in the kitchen-Part 1
How to Prepare Basic Garam Masala at Home
How to make Ginger Garlic paste at home
How to extract fresh Coconut milk at home
My experiences in the kitchen-Part 1
July 18, 2014 by admin
Filed under How to make...for beginners, Kitchen tips & tricks
 Working in the kitchen is fun. If the day is hot and not going good you will end up with more mess. Here are few special tricks that I have learnt along with the art of cooking . I started off with great experiences and at times disastrous ones too during experimentation in the kitchen. I wish to share these tricks and kitchen tips to the beginners and newbies experimenting in the kitchen.
Indian cooking involves lots of masalas, powdering and grinding in the cooking process You can save time and effort, also learn from experiences rather than inventing the wheel again.
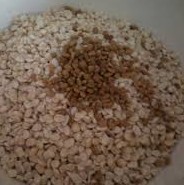
Frying papad at home:
- Prick at least two holes to avoid papad bulging. Store in tight containers to avoid fried papad becoming soft.
- Place unfried papad in the refrigerator. To prevent stiffening and breakage of the papads once the cover is opened, place the unfried papads in a polythene cover this will prevent stiffening and breakage.
Boiling milk:
- Dispense packet milk into container and only then place on the stove. If not the milk catches at the base leaving a burnt smell. Low or Medium flame should be maintained while boiling milk.
- While boiling milk at medium heat stir the milk with a spoon. It will avoid milk sticking at the bottom of the vessel.
Handling hot oil:
- While frying puris in oil, immerse in oil and then press with a flat spoon such that the puri will puff like a ball. Do not leave the dough for a long time, it’ll absorb oil. Instant frying is the key to avoid oil absorption for puri.
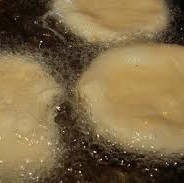
- To check oil is hot, put a small piece of the dough / batter. If it comes up boiling, the oil is hot enough to fry. If the batter is lying at the base, oil needs more heating.
- To cool the oil and avoid fumes after frying activity, switch off flame and put 8-10 cooked rice into the oil. It will absorb the heat.
- Fry papad in medium flame. To retain color of fryums while frying, heat the oil sufficiently, lower the flame completely and then add fryums to avoid the deep brown color
Cake baking tips:
- Weigh and add quantities while you plan to make a cake. Measuring can be tricky and the cake baking will not be accurate.
- If you plan to add soaked nuts and raisins while baking. Coat them with All purpose flour (maida) and then add when the baking is half way through. This will avoid the nuts and raisins reaching the bottom.
- After applying butter on the cake tin, sprinkle maida and then pour the batter. The baked cake will come off easily.
Making soft idli and crispy dosa
- If you add half a teaspoon of fenugreek seeds to the lentil and rice mixture while soaking, dosas will be more crisp, idlis will be soft.
- Apply ghee in the idli tray prior to dispensing the batter. The idlis will come away freely without sticking at the base.
- To check tawa has become hot , sprinkle few drops of water. If it sizzles with steam coming out it indicates tawa is hot.
- Rub slices of onion on dosa tawa (griddle) before spreading dosas. This will avoid the dosa from stubbornly sticking to the griddle or tawa.
Preparing cutlet with a crispy covering
- To prevent oil foaming while frying cutlets- use only egg white. Make a small hole on one end of the egg. Let the egg white flow freely into a bowl. Whisk the egg white thoroughly and the process will not be messy.
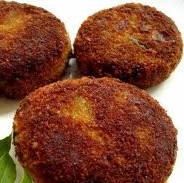
- To get a crispy covering for your cutlets, powder fresh bread. Dip the cutlet balls in egg white (pepper and salt included) and finally coat with powdered fresh bread.
- If you have to make cutlets in a hurry and have no breadcrumbs use semolina for coating them.
There is a popular saying, “ The best way to win a man’s heart is thru’ his stomach”. You can also win the hearts of your family members by cooking good and healthy food.
Remember to cook as per the need. Avoid wastage as there are thousands of people going without a meal every day.
Related reading:
How to Prepare Garam Masala at Home
How to make Ginger Garlic paste at home


