

UGADI PACHADI
March 31, 2014 by admin
Filed under Chutney varieties
 Ugadi Pachadi is made on the auspicious occasion of Ugadi. Ugadi marks the beginning of the Telugu New Year. This festival brings happiness with the beginning of Vasanth Ruthu (Spring season). Ugadi pachadi is a mandatory preparation in all Telugu homes. This pachadi consists of 6 tastes also known as Shadruchulu i.e Sweet, Sour, Bitter, Salty, Spicy-Hot and pungent.
This is an easy recipe not requiring great skills. The right proportions in addition of ingredients will bring up that taste that will bring in nostalgic memories of childhood days.
Ingredients:
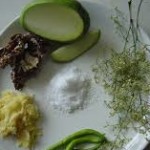
Neem flower petals: 2 tea spoons
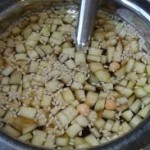
Raw Mango: 2 Table spoons (finely chopped)
Tamarind: Small lemon size ball
Green chillies: ½ tspn finely chopped
Salt: ¼ tspn
Jaggery: ½ cup powdered
Water: 3 cups
Ripe Banana: 1 no. chopped
Putnal pappu / Fried chick pea: 2 table spoons
Procedure for Ugadi Pachadi:
- Separate the petals from the flowers by rubbing them between your palms. Sieve and collect only the petals of the neem flowers. Wash and keep aside
- Soak tamarind in 1 cup warm water for 20 minutes. Add 2 cups of water and dilute it to a thin, watery mix.
- Heat putnal papu and keep aside.
- Add rawmango pieces, neem flower petals, salt, green chilles, grated jaggery. Mix well till jaggery dissolves completely. Then add cut banana and roasted putnal pappu.
- Serve chilled for the youngsters who tend to be fussy over the taste. Use water stored in earthern pot (Kunda) such that the temperature is suitable for elders while serving Ugadi Pachadi at your home.
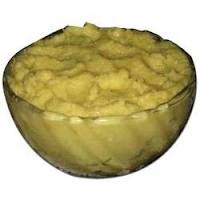
Homemade katti meethi Ugadi Pachadi is ready to serve.
Few areas in andhra do add roasted Sesame(til) and crushed saunf (fennel)
Special dishes like Pulihora, Bobbatlu- Puran Poli and Payasam is served .Learn to make special laddoos this Ugadi for your family and dear ones.
HAPPY UGADI….Wishing all prosperity ….UGADI SUBHAKANKSHULU
“U” thsavam – Festival
“G” owravam – Respect
“A” anandam – Happiness
“D” hanam – Money
“I” shwaryam – Prosperity
“UGADI” Shrikara Nama Samvatsra Shubhakankshalu!
WHEAT STEAM CAKE-GOTHAMBU PUTTU
March 18, 2014 by admin
Filed under Breakfast recipes
 Wheat steam cake is a special breakfast in Kerala, popularly known as Gothambu puttu or Wheat puttu. Due to health reasons people are avoiding rice flour breakfast and switching over to wheat flour recipes, oats recipes as this is healthy and filling too. People with diabetes will not feel hungry till noon. Wheat steam cake is a healthy breakfast which can be made easily at home.
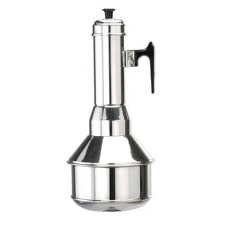
I learnt this recipe as my in-laws were diabetic and I wanted to avoid rice flour in the breakfast menu. The preparation is easy, you require a puttu maker or a steel sieve like utensil with large holes. This can be placed over a wide bowl such that all steam passes thru’ the sieve and the puttu is steam cooked.
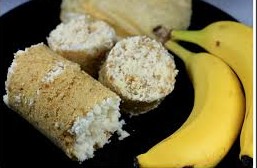
We have a puttu maker so that we get a long cylindrical steam cake in our plates. When served hot they enjoy it. You can certainly give a try.
Ingredients :
Wheat flour: 1 cup
Grated coconut: ¼ cup
Salt: 2 pinches ( to taste)
Water: 1/3 cup or sufficient to wet the powder.
Accessory required: Puttu maker
Procedure for preparing Wheat Steam cake – Gothambu puttu:
Method:
- Dispense wheat flour in a wide kadai. Dry roast wheat flour over medium flame stirring continuously until the powder feels warm when touched with your palm.
- Watch out for the powder not to catch the base.
- Remove from flame and allow wheat flour to cool.
- Sprinkle lukewarm water on the powder and stir the powder thoroughly. You will observe small lumps. Continue sprinkling little water till all the dry powder has formed small fine lumps.
- Ensure the powder has not become sticky. The right check for consistency is when you hold a fistful of powder it forms a shape and stays together, when you press the ball it falls apart.
- Transfer this wet powdery lumps into a mixer and inch it 2-3 times. This will remove all lumps and give a uniform puttu base.
- Place the puttu maker on the flame and when steam starts releasing from the vent holes, remove the puttu holder from the pot.
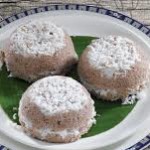
- Fill the ingredients layer wise. Fill grated coconut, prepared wheat flour, and repeat this filling once more. The last layer should be grated coconut.
- Fill contents loosely .Do not compress the wheat flour into puttu maker.
- After 6-8 mins of continuous steam releasing thru the vent the wheat steam cake is ready to serve.
- Gently push the steamed wheat puttu onto a plate. Ideal combination is with small banana (pazham) and sugar.
Diabetic patients can enjoy gothambu puttu with pappadam, cooked moong gram, Kadala curry. Few enjoy wheat puttu without any additions. They prefer it hot. The fresh coconut which blends with the gothambu puttu gives that extra taste factor.
A suitable alternative if you do not have a puttu maker is a kadai in the bottom with a wide sieve placed on top to grab all the steam. Spread coconut at the base then prepared wheat flour and again repeat this layer 1 time. Ensure the spread is loose and not compressed. Close the sieve with a large plate to avoid steam loss.
 Wheat puttu is a healthy breakfast and can be made easily at home. Have a healthy start. There are other variations like rice puttu, ragi puttu, oats puttu,rava puttu.
If you like this recipe or know of any variations do let us know in the comments.
How to make Ginger- Garlic paste at home
March 4, 2014 by admin
Filed under How to make...for beginners
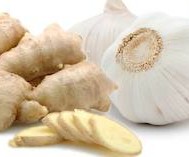
 Ginger garlic paste is an indispensable ingredient in every Indian Kitchen. Most of the curries call for ginger garlic paste. All the more for the non vegetarians. You can make fresh ginger garlic paste at home. Homemade ginger garlic paste is the best as it is fresh and you are sure there are no artificial flavors and hygiene factors are maintained too.
I make the paste during weekends and therefore I’ have stock for 2 weeks at east. The procedure is very simple requiring some pre-work. The pre-work is time consuming , the results are great. The purchased ginger garlic smells different with a color tinge too. Therefore replicate the process of preparing ginger garlic paste at home.
The basic ingredients are Ginger and garlic. Add salt while grinding. Salt will act as a preservative during storage and will help retain freshness. Soak ginger in water for 10 mins to remove soil and color. Peel ginger skin after draining water. Recycle the muddy water in the potted plants. Peel garlic to avoid strands in the paste.
Tips to peel garlic:
Separate garlic pods and then apply a little vegetable oil and place it in the sun for an hour. The garlic needs to be pushed at the top side and the peel can be separated. I usually do garlic peeling while watching television. You will not realize the effort as you will be engrossed watching the show. Included humor…..
Watch out for the kids not switching ‘ON’ on the ceiling fan without informing you. The entire room will be spread with garlic peel. The other source can be the wind blowing from the window. Ingredients :
Ginger: 100 gms
Garlic :100 gms
Salt: ½ tsp
Procedure for preparing Ginger garlic paste at home:
Method:
- Wash, rinse and peel ginger. Drain water and chop into pieces.
- Peel garlic. Chop the garlic pods if large.
- In a mixer add chopped ginger and garlic pods. Add salt and grind to a fine paste.
- You can add 2 to 3 tspns of water if the contents are not freely moving in the mixer.
- Transfer contents to a clean dry bottle or box.
- Dispense with a clean dry spoon. Place the bottle in the refrigerator always.
- Shelf life is 3 to 4 weeks if placed in the refrigerator.
- If placed out for more than an hour the color changes also giving an aged smell.
 Salt addition while grinding ginger garlic is a tested and sure way for long storage. People do add oil, turmeric powder to keep ginger garlic paste fresh
 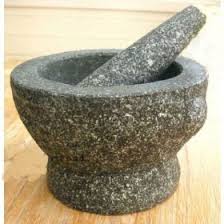 At times I prefer to add freshly minced ginger garlic especially for non vegetarian dishes. I have a grinding stone to crush ginger and garlic as per requirement.


