Pickled Raw Papaya- tasty crispy version
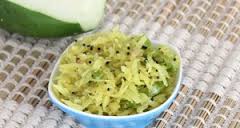 Raw papaya pickle is a quick and interesting recipe. Raw papaya pickle is a good appetizer and good enough for digestion too. You can relish the taste as a starter too. It is not spicy and can be enjoyed by children too.
The papaya crop is abundant and at times you get blessings from your neighbours kitchen garden as it their first harvest. To sum up you will have several fruits at the same time and you will be in a dilemma to consume them as it is your favourite fruit too.
Keep all your worries aside as there are many ways you can utilize papaya .For your information tutti frutti used in cakes and breads are made from raw papaya . This was news for me too. However let’s come back to the recipe that will take only 10 minutes for preparation.
Ingredients for Pickled Raw Papaya
- Raw papaya : 2 cups (diced)
- Green chilly / Bird’s eye chilly : 2 nos
- Mustard seeds:2 tspn (crushed)
- Salt: 1 tspn (as per taste)
- Vinegar: 1/3 cup
- Curry leaves:1 stem ( optional)
- Water: 2 cups
Procedure for preparing Pickled Raw Papaya
Method:
- Peel and wash the raw papaya. Cut the raw papaya into small cubes.
- In a small bowl heat 2 cups of water. Add the diced raw papaya when the water comes to a boil.
- Put off the flame. After 2 minutes drain the water completely. The papaya is semi cooked now.
- Add crushed mustard, salt, chopped green chilly or bird’s eye chilly, vinegar and chopped curry leaves to the bowl containing drained papaya. Mix all the ingredients.
- Transfer the ingredients into a glass jar and leave it overnight. The steamed papayas will absorb the salt, chilly and vinegar.
- The crushed mustard only enhances the taste of the pickle.
- This raw papaya pickle is a great alternative during meal time. Try this and do not miss to reply with feedback.
Papaya has numerous health benefits. Grab the opportunity to be healthy by incorporating healthy dishes and a great lifestyle too.
You can try variations in this recipe by adding chilli powder, other vegetables. Try this recipe and enjoy easy and healthy cooking. For more healthy and tasty recipes visit our Facebook page and Google+ page.
Ravani Cake Drenched with Sugar Lemony Syrup
February 17, 2015 by admin
Filed under Cakes-Baking, Desserts
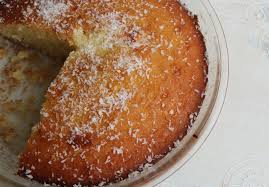 Ravani or Revani is a buttery cake doused with syrup. The recipe I’m sharing with you today attains a texture that is so delicate, it’s so fluffy, it’s so moist, it’s sweet but not overly sweet and there’s a twist. The addition of desiccated coconut to the batter is truly the secret that makes it taste divine and that it gives a different, more luscious texture to the cake.
The syrup is lemon flavored and it permeates the cake giving it a delicious lemony taste that’s prominent but not overpowering. This syrup is so light, “showering” the cake, balancing out its buttery and sugar notes.
Its pale yellow color with golden brown top is a beautiful sight. It’s mouth watering and the aroma of lime zest is awesome and in new gen language ‘ mind blowing’. As you bring a piece of ravani to your mouth you can smell the butter, the lemon and the exotic coconut and when you taste it, it fulfills every expectation.
You can serve it with a dusting of desiccated coconut, with a side of vanilla ice cream, accompanying your coffee or tea and it is guaranteed to satisfy your sugar craving after dinner.
Most versions of Ravani contain semolina flour (rava/ sooji). But for this recipe we have opted for all-purpose flour (maida) which is a far better choice for this cake. Semolina flour is one of the ingredients that make Ravani incredibly heavy.
Ingredients for Ravani Cake drenched with sugar lemony syrup
For Ravani Cake
- 150 g unsalted butter +10 g for greasing the pan
- 250 g sugar
- 3 medium-sized eggs
- 150 ml milk (preferably whole milk)
- 250 g All-purpose flour/Maida
- 1 tsp Baking powder
- 150 g desiccated coconut
For Sugar syrup
- 350 g sugar
- 360 ml water
- 4 tsp lemon juice, freshly squeezed
- Lemon peel from 1 medium-sized lemon
Procedure for preparing Ravani Cake drenched with sugar lemony syrup
Method:
For Ravani Cake
Pre-work:
a)Preheat your oven to 175 degrees Celsius.
b)Grease the bottom and the sides of the spring-form pan/ baking pan with some butter.
c)Powder sugar quantity kept for cake.
d)Need to prepare the sugar syrup too (refer directions below)
e)In a large bowl, mix sugar and butter with a hand blender until it is fluffy. Add the eggs one by one, beating continuously, until they are totally combined into the mixture. Pour in the milk and beat well.
f)Add the flour and baking powder and beat until mixed and then add the desiccated coconut. Keep aside 2 tsp for garnishing the cake. Mix in the coconut with a rubber spatula until the mixture is well blended.
g)Pour the batter in the spring-form pan and place it in the preheated oven. Bake for 35 to 40 mins.
h)After 35 minutes, check if cake is sufficiently baked by inserting a tooth pick or a knife in the middle of the cake and also check if it comes out clean. If it is still sticky, bake for another 5 to 8 mins.
For Syrup:
- Meanwhile prepare the syrup. In a small saucepan, add the sugar, water, lemon juice and lemon peel. Bring to a boil over medium-high heat, stirring until all the sugar is dissolved, then lower the flame and boil uncovered, for 10 minutes. Remove from heat and leave the contents to infuse i.e all the flavors to get incorporated in the sugar syrup. Remove the lemon peel from the saucepan and discard it.
- When the cake has baked well, remove from the oven and place it on a wire rack to cool. The cake will have a golden brown color on top. When it has cooled down a bit, pour the warm syrup over the cake, a spoonful at a time, starting to pour always from the middle of the cake.
- Leave the drenched cake on a wire rack to absorb all the syrup and cool completely. Then remove the interlocking side band of the pan and cut the cake into squares (while still being on the round base of the pan). Remove each square and place it on a cake dish.
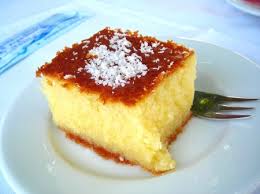 Decorate the cake with desiccated coconut ,sprinkle on top.
- If you have used a regular pan for baking the cake, then you need to separate the cake from the baking pan and when it has sufficiently cooled pour the sugar syrup on the cake as mentioned above.
Also check: Alcohol free Plum cake recipe for Last minute bakers
Note:
1. The cake will be almost stuck at the bottom of the pan and that is why you need to cut it into pieces first so that it doesn’t crack while trying to remove it as a whole.
2. Remember whole milk is preferable as it contains 3.5% milk fat and is the closest to the way it comes from the cow before processing.
Serve the cake and keep in mind that it tastes far better the next day!!
The cake will remain fresh for 4-5 days, covered, at room temperature.
Try this recipe and enjoy easy and healthy cooking. For more healthy and tasty recipes visit our Facebook page and Google+ page.
Hot and Spicy Chicken Pepper Masala
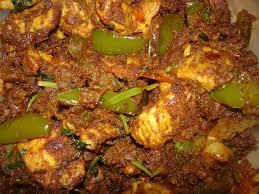 Hot and Spicy Chicken Pepper masala is a popular dish at home especially during winter and rainy days and when the family is in a mood for eating out. The dish is easy to prepare, you can become an expert and prepare this dish when you have guests at home too.
Spicy Chicken Pepper masala can be made a little less hot and spicy by reducing the pepper powder quantity. The dish looks attractive and is a great hit among family too. Try this recipe and surprise your family with exquisite treats.
Let’s move on to the recipe and understand the requirements.
Ingredients for Hot and Spicy Chicken Pepper Masala
- Chicken : 500 g (preferably use skinless and boneless chicken-thigh)
- Green Ball pepper/ Capsicum: ½ cup (diced)
- Onion : 1.5 cup (chopped)
- Tomato: 1 cup ( chopped)
- Ginger: 1 tsp (finely chopped)
- Garlic: 4 to 5 cloves (finely chopped)
- Green chillies: 2 nos ( finely chopped)
- Curry leaves: 2 sprigs
- Pepper powder: 1.5 tsp (adjust to your taste)
- Turmeric powder: ¼ tsp
- Chilli powder: ½ tsp
- Coriander powder: 1 tsp
- Cumin powder: ½ tsp
- Garam Masala Powder: ¼ tsp
- Fennel seeds / Saunf: ¼ tsp
- Coriander leaves / Cilantro: 1 bunch(finely chopped)
- Oil: 2 tbsp
- Salt: to taste
- Lime: ½ no.
Procedure for preparing Hot and Spicy Chicken Pepper Masala
Method:
- Cut and wash chicken thoroughly, add juice of half a lemon and rinse the pieces well. The benefit of adding lime is it will take off the smell and your pieces will look clean. Drain water and rinse once more with fresh water.
- Drain water completely through a sieve and transfer the chicken pieces to a bowl.
- Add turmeric powder and keep aside.
- Heat 1 tbsp of oil in a kadai/ pan, add chopped capsicum and stir for 2 minutes along with ¼ tsp pepper and ¼ tsp salt. When mixed transfer contents to a plate.
- Ensure the pepper is coarsely grinded for this dish.
- Heat 1 tbsp of oil in the kadai add saunf, when it splutters add curry leaves, chopped garlic, ginger and green chillies. Saute on a medium flame, add 1 tsp pepper powder and allow it to sizzle in the heat.
- Now add onions, sprinkle little salt and sauté till they are light golden brown. This will take approx 4 to 5 mins.
- To this add chopped tomatoes and stir till it becomes mushy.
- This is the stage when you need to add all the dry powders and mix on low flame. If you want to have gravy sprinkle little water.
- To this base add chicken pieces and stir fry for another 2 minutes and cook covered in medium heat until the chicken pieces gets cooked. The pieces should become soft and tender.
- At this stage add roasted capsicum kept aside in a plate, after stirring for 2 mins add balance pepper powder and mix all the contents in the kadai.
- Add the chopped coriander leaves and switch off the flame.
Your hot and Spicy Chicken pepper masala is ready to serve with hot rice, chapathis, pulka, side dish for biryani , vegetable pulao too.
You can try variations in this recipe by adding potato, mushroom, paneer /cottage cheese. The vegans can exclude chicken and add the above vegetables and I’m sure you are going to try the vegan preparation. Do not miss to give us an update.
Try this recipe and enjoy easy and healthy cooking. For more healthy and tasty recipes visit our Facebook page and Google+ page.
Quick Spicy snack- Bread Paneer Rolls
January 22, 2015 by admin
Filed under How to make...for beginners, Snacks & Salads
 Bread Paneer rolls are a great snack and a tasty appetizer for high tea also called afternoon tea. A quick and easy recipe. The ingredients are all available at home. It is a matter of preparing the snack. Paneer is Indian cottage cheese or Chena, you can easily make it at home.
Involve your kids for the preparation and they will definitely nourish the snack. A nice way to learn new skills and preparing in emergencies.
Most of the dishes that is prepared at home was learnt by merely watching my mom and aunt doing the home tasks. Actually about two decades back there was less opportunity to watch cooking shows on Television. Now with the zoom of technology and several channels emerging on television you get to see several chefs and in case you missed the schedule, you can watch the same recipe thru’ a video or blog.
This opportunity was not there then. However we made use of our memory or at the most write down the recipe for future reference. I still continue that practice of jotting down in the Recipes diary.
Let’s move on to the recipe and understand the requirements.
Ingredients for Bread Paneer Rolls
- Bread slices : 6 nos
- Shredded paneer / Cottage cheese: 1 cup
- Green chilly: 1 tsp (finely chopped)
- Jeera / Cumin seeds: ¼ tsp
- Garam masala powder: ¼ tsp
- Coriander leaves: 2 tsp (finely chopped)
- Ginger : 1 tsp ( finely chopped)
- Pepper powder: a pinch
- Milk: 2-3 tsp
- Salt: to taste
- Ghee: 2 tbspn
- Water: ½ cup
- Butter-2 tbsp ( to apply on roll during heating)
This recipe will make 6 bread paneer rolls.
Procedure for preparing Bread Paneer Rolls
Method:
- In a small bowl add shredded paneer, chopped green chillies, jeera, garam masala, coriander leaves, chopped ginger, salt and mix well. Filling is ready.
- Trim the edges of the bread slices. Preferably use sandwich bread.
- Flatten each bread slice using a rolling pin.
- Spread a thin layer of the filling mix onto the flat bread slice. Sprinkle water to make bread moist and also roll it into a cylinder, making sure the edges are sealed.
- When the heating pan or skillet is ready butter all around the roll and grill on medium heat. You should keep turning to ensure even browning all around the bread paneer roll.
- Serve them with tomato ketchup. You can cut them into halves and make it even more tempting for the kids.
Hey get going…try making some bread paneer rolls.
You can try variations in this recipe by adding mashed boiled potato in place of paneer. Try this recipe and enjoy easy and healthy cooking. For more healthy and tasty recipes visit our Facebook page and Google+ page.
Make Delicious Dry Orange Rind Candies for your kids
 Orange peels are the thick finely-textured and orange colored skin of oranges. Since ancient times, orange peels have been valued for their curative properties.
Now there is oranges in abundance. You can make dry orange rind candies and use in cakes and other desserts, decorating sweet dishes too. Orange peel candies are made from orange zest, the top layer of the orange peel. This is a simple recipe and can be stored for a full long year.
The unique smell and flavor of orange is felt when you have a cake bite comprising orange rinds. Preferably use organic variety to avoid pesticides. Try this recipe to flavor orange all round the year.
Ingredients for Dry Orange rind Candies
- Orange peel of 3 large oranges
- Sugar: 1 cup
- Water: 6 cups
Procedure for preparing Dry Orange rinds
Method:
- Peel oranges and place in a flat bottomed pan. Add water till the level of peels.

- Boil the orange peels for 10 minutes. Strain the water and add fresh water in the pan.
- Repeat the boiling of orange peels for 2 more times. This will ensure all bitterness is removed. Drain off all water and cool on paper towels.
- Scoop the white pith on the inner side of the orange peel with a spoon till you see only the orange color of peel.
- Use a chopping board to cut the orange peel into ¼” long strips
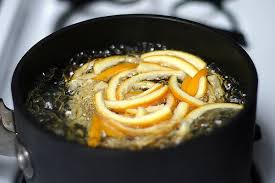
- Now add 1 cup of water and sugar into a heavy and flat bottomed pan. When the water starts boiling, add the orange strips and reduce the flame.
- Keep the stove in sim for about an hour letting the orange peels boil in sugar syrup. Watch the process at regular intervals, give it a stir to check water level.
- After an hour’s time, put off the flame, take out the orange rinds and place on a flat surface. Store each orange strip without touching each other.
- You can transfer the remaining sugar syrup into a glass bowl and store in the refrigerator, ideal as orange flavoring in sweet dishes.
- It will take approx. 5 to 6 hrs for drying. Once the orange rinds have completely dried store them in an airtight container. Dry orange rind candies can be retained for a year by following this preparation.
Orange rind candies are loved by kids for its sweet and orange flavor. You can use in cakes, decorating ice cream or other fruit desserts. Dry orange rinds can be dipped in hot chocolate and can be consumed as orange chocolate candies.
Health benefits of orange peels are:
- You can prepare a relaxing tea with orange peel extract to soothe your digestive system. Dietary fiber is useful for preventing irritable bowel syndrome including constipation and bloating.
- Orange peels were used as medicine to cure various digestive disorders including indigestion.
- Orange peels can lower the total cholesterol levels in the body.
- An active chemical in orange peels helps relieve heartburn,
- The chemical compounds in orange peels also help inhibit the growth and division of cancerous cells.
- The anti-oxidants in oranges especially vitamin C may help avert numerous respiratory problems
Other uses and benefits of orange peels
Orange peel powder is popularly used as a face mask to help people who have oily skin, blackhead problems, reduce discoloration, reduce pimple scars and blemishes, to lighten their skin tone and smoothen skin. Orange peel paste can be used to whiten yellow-stained teeth.
Wishing you all Merry Christmas!!
Try this recipe and enjoy easy and healthy cooking. For more healthy and tasty recipes visit our Facebook page and Google+ page.
Try other recipes that is ideal for Christmas: Ginger wine , Home made biscuits, caramelized sponge cake, alcohol free cake
Alcohol free Plum cake recipe for Last minute bakers this Christmas!!
December 9, 2014 by admin
Filed under Cakes-Baking
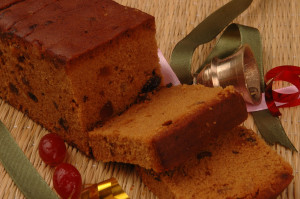 Christmas time is when you get to see a lot of cakes, cake baking and decorated cake varieties in bakeries and malls. Cakes are a delight and the plum cake happens to be very close to heart. Fond memories of all family members gathering during Christmas eve and sharing the occasion with love and togetherness.
This recipe of alcohol free plum cake is planned for last minute bakers who did not get sufficient time to soak the fruits in advance. You can now bake a cake whenever you have the urge to have a bite of plum cake. There is no soaking involved and the recipe is simple and taste similar to a plum cake which is soaked in alcohol i.e rum/ brandy for a long duration.
Ingredients for Alcohol free Plum cake
- All purpose flour / Maida: 100 gm
- Butter: 100 gm
- Sugar: 100 gm +3 tsp
- Eggs: 2 nos ( equivalent to 100 gm weight)
- Baking powder: ½ tsp
- Raisins (Kismis): ½ cup
- Tuttie-Fruitie: ½ cup
- Orange peels (dried): 2 tsp – chopped finely
- Cashew nuts(Kaaju)-1/4 cup
- Vanilla Essence: 1.5 tsp
- Water: ½ cup
- Spice powder: cardamom-2, cinnamon bark-1 small stick, nutmeg-a small pinch
Procedure for preparing Alcohol free Plum cake
Method:
- The first basic step is to caramelize sugar. Boil ½ cup water in a pan. Then heat three tsp of sugar in the center of a flat bottomed pan. Do not touch the pan or mix the sugar. The sugar will start melting and when there is no sugar (white color specks) to be seen add ½ cup boiling water and switch off the flame.
- Now mix sugar and water well and bring it to a boil. It is time to add the raisins, tuttie-fruitie, cashewnuts in the pan. Continue boiling for 5 mins on a medium flame, check if they have become tender. If yes, then put off the flame and allow the fruits to cool down.
- Next major step is to sift maida and baking powder. Keep aside 3 tspn of baking powder and sift the powders 2 to 3 times.
- Keep aside 2 tsp of butter for greasing the baking pan. Butter should be at room temperature, powder sugar and beat the butter and sugar until fluffy and add eggs one by one and beat well. If you are not using a blender to beat the base, you can beat the eggs in a mixer and add it into the butter and sugar mix.
- Add vanilla essence and spice powder and dried orange peels. Mix well. Add the flour powders. Pour the caramelized water and you will see the cake base turning brown in color. Do not add fruits and nuts at this stage.
- Add 3 tsp of maida to the strained fruits and nuts and ensure there is a light coating over all the soaked fruits. By dusting maida on the soaked fruits you will have equal distribution across the cake. Dusting with maida will prevent the fruits and nuts from sinking to the bottom of the cake while baking. Sharing my experiences in the kitchen…
- Add the dusted fruits and nuts to the cake mix. Pour the batter into the greased baking pan and level the top of the cake.
- Bake it in a preheated baking oven at 350 ° F for about 40 to 50 mins. Use a toothpick or a long pin to check baking is enough. If the pin comes out clean the cake is ready. You will also observe a nice dark brown color on the top layer.
- Remove the baking tray and allow the cake to cool. Slice it only when it has cooled down. Watch out for the cake not crumbling when you are making slices.
Tip: You should use a sharp knife to cut the cake. Wipe the knife clean after slicing 2 to 3 pieces. This will avoid crumbling of cake.Use baking cutters if required.
For perfect baking and no breaking it is always recommended to weigh and add quantities. Dispense only the egg white to balance accuracy in addition.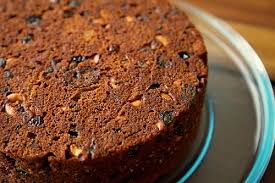
Now with most places going dry and people becoming vegan during 25 days of Christmas (lent- nombu) the alcohol free plum cake will be a huge hit.
Serve plum cake with homemade Ginger wine or Chukka kapi which is a great combination during chilly weathers. You can also serve for carols and your near and dear ones on Christmas eve.
Wishing you all Merry Christmas!!
Try this recipe and enjoy easy and healthy cooking. For more healthy and tasty recipes visit our Facebook page and Google+ page.
Also read:
Bake a Sponge cake with Caramelized sugar
Vattayappam –Steamed rice cake
Vettu Cake – Popular 4 pm Snack available at Bakeries and Tea stall in Kerala
Beef Cutlet recipe -Kerala style
Sukhiyan Popular 4pm snack with High protein
Potato French fries- Homemade recipe
November 25, 2014 by admin
Filed under Snacks & Salads
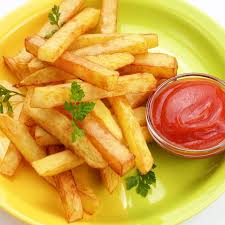 Potato French fries is a special snack for the kids at home. They insist on buying Potato French fries when they go to any Food outlet. It was then I decided to prepare this snack at home. I was looking at the right crispiness when fried and it was a big surprise when we achieved the taste for the homemade Potato French fries which had the look and taste of popular food outlet.
When the table was set with Potato French fries and tomato ketchup, I could see the elders also staring at the plate. Therefore we had two sets fried, first for the kids and later for the elders. Now I can avoid purchasing the frozen ones and save money by preparing at home.
Ingredients for Potato French Fries
- Potato: 2 large ones
- Salt: to taste
- Chilli powder: to taste
- Cooking oil: 1 cup
- Water: 5 cups
Procedure for preparing Potato French Fries at home
Method:
- Peel potato and wash them, chop them in ½ inch thick and long slices.
- Place the pieces in 2 cups of water for 5 minutes.
- Drain water and add the potato pieces in boiling water for 3 minutes.
- Put off flame. Drain water and spread the potato pieces on a tissue paper.
- Store these pieces in refrigerator for 4 to 5hrs. This will ensure crispiness on the exterior when fried.
- Heat oil in a flat bottomed pan. When sufficiently hot add few potato pieces in batches and fry them till they are crisp on the exterior.
- Maintain low flame to avoid color change of the Potato French fries.
- Drain onto tissue paper and afterwards transfer on a serving plate. Sprinkle with salt and chilli powder
- Serve Hot and crispy Potato French fries with tomato ketchup or sauce.
Ideal for kids and with a little pre-work you can bring a smile on your little one’s face.
Go ahead and give this recipe a try. Follow precautions while handling hot oil.
Also read: My experiences in the kitchen-Part 1 & Part 2
You can store in air tight containers to ensure crispiness.
Potato French fries is easy to prepare, requires less time and effort and therefore ideal for evening snacks, birthday parties and kids gathering.
Try this recipe and enjoy healthy cooking. For more healthy and tasty recipes visit our Facebook page and Google+ page.
Nan Katai –a treat for your kids this Children’s day
November 14, 2014 by admin
Filed under Snacks & Salads
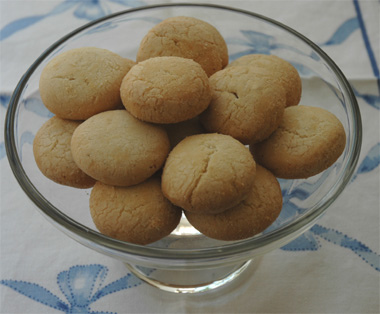 Nan katai is a buttery Indian cookie that is popular among kids and elders alike. Nan katai is made from simple ingredients that are available in every kitchen. Nan katai can be easily made at home. These delicate crumbling delicacy is popularly made during festivals like Diwali and as a snack during birthday parties.
14 Nov is celebrated as Children’s day in India to commemorate the birthday of our Former Prime Minister Pandit Jawaharlal Nehru who is fondly called Chacha Nehru by children. Several programs are organized in schools and in residential societies to have fun and spread the joy in children. There is no teaching in schools on this day and children attend cultural programs conducted by teachers.
Kids come home early from school with a huge appetite. They do not want the regular stuff prepared at home. They want royal treatment as it is their day, so moms get ready and surprise your kid with this sweet that will bring a big smile on your kid’s innocent face.
All sweets are prepared in the name of kids and in fact the boxes are emptied by older kids and elders. For a change let them too enjoy this special day with a treat. Let us go thru’ the ingredients required to prepare Nan Katai.
Ingredients for Non Katai – Indian Butter cookie
- Maida / All Purpose Flour: 1.5 cups
- B.Rawa / Sooji: 3 tspn
- Chana powder / Chick pea flour: ¼ cup
- Ghee / Butter: ¾ cup
- Sugar: ¾ cup (powdered)
- Elaichi / Cardamom: 5 nos (powdered)
- Vanilla Essence: ½ tsp
- Baking powder: ½ tsp
Optional - For decorating the nan katai: Cashew- 6 nos, Badam/ Almonds – 6 nos or Pistachio-6 nos ( chop into fine pieces)
Procedure for preparing Non Katai – Indian Butter cookie
Method:
- In a vessel mix ghee / butter, powdered sugar, vanilla essence .
- In another vessel mix all the powders: Maida, Sooji, Chana Powder, Elaichi powder, baking powder. You can sift the ingredients through a sieve to ensure uniformity of baking powder in the flour.
- Now add the mixed powders into the first vessel containing ghee / butter mixed with powdered sugar. Mix till it becomes a soft dough.
- Grease the baking tray with ghee/ butter.
- Make small balls of the dough and flatten it a bit. Place the flattened dough rolls on the plate.
- Maintain distance between the katai rolls.
- Decorate with the chopped cashew nut / badam / pistachio and place the tray for convection baking at 150 deg c for 35 mins.
- Non katai- Indian Butter cookies are ready. Serve it when it has cooled down.
You can store in air tight containers for a month’s time.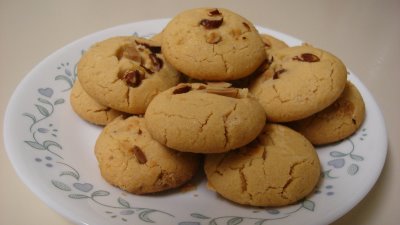
Nan katai is easy to prepare, requires less time and effort and therefore ideal for travel, birthday parties, kids gathering.
Try this recipe and enjoy healthy cooking. For more healthy and tasty recipes visit our Facebook page and Google+ page.
You can also read recipes for kids:
Kerala Vettayappam–Steamed Rice Cake
Sukhiyan Popular 4pm snack with High protein
Instant recipe for Khatta Meetha Chutney
November 4, 2014 by admin
Filed under Chutney varieties
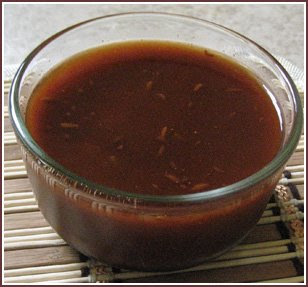 Khatta meetha chutney is a mandatory ingredient that adds flavor to the snack items. Khatta meetha chutney is used in popular recipes like Dahi Vada, Pani Puri, Bhel puri, Ragada chaat, Samosa, Chilli bajji, etc. We do not get this chutney ready to use in shops, therefore this recipe is critical to make tasty snacks.
Children love to eat snacks from the stalls placed by vendors and considering the risk to health, I prefer to prepare snacks at home and serve to my kids. I’m free of stress with the thought of them getting sick.
Ingredients for Khatta Meetha Chutney
- Tamarind: 2 balls ( lemon sized)
- Jaggery / Gur / Sharkkara: 3 tbspn (grated)
- Jeera: ¼ tspn
- Chilli powder: ½ tsp
- Cooking oil: 2 tbspn
- Salt:1/4 tsp
- Water :1/3 cup (to soak tamarind and make pulp)
Procedure for preparing Khatta Meetha Chutney
Method:
- Soak tamarind in water for an hour. Extract thick pulp and filter the same to remove shreds.
- Grate jaggery and keep aside.
- In a shallow pan heat oil and add jeera. When it splutters, lower flame and add chilli powder.
- To this base add tamarind pulp, grated jaggery, salt and mix well.
- Close the pan with a lid and allow this mixture to boil on a low flame for 10 to 15 mins until it thickens.
- The khatta meetha chutney is ready and can be used for your snack preparations.
The chutney can be refrigerated for about 3 months for further use. Store in an air tight container.
Similarly you can try the dates chutney that can used for dosa, chapathis, enjoyed by children for its sweet and sour taste.
Making snacks like pani puri, dahi vada call for preparation of several items that are mainly basic ingredients for the snacks You can save time by preparing the chutney in advance and go ahead planning the others just in time.
Hope you enjoyed the instant recipe for Khatta Meetha Chutney. Try this recipe and enjoy healthy cooking. For more healthy and tasty recipes visit our Facebook page and Google+ page.
Aval Nanachathu- Sweet Poha with Coconut
October 30, 2014 by admin
Filed under Breakfast recipes, Rice varieties, Snacks & Salads
Aval nanachatha is an instant recipe ideal for breakfast and evening snacks. Sweet Poha with coconut is served during travel too as it is convenient to serve and eat too. Small banana is a good combination to have along with aval nanachatha, you can have it otherwise too.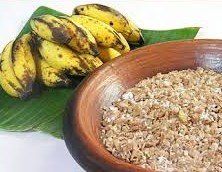
Aval is also called Poha in North India, Flattened rice, Atukulu in Telugu. Poha is made with a spicy taste in North India. Aval nanachatha itself means wetting or dampen the flakes. Therefore you need to lightly sprinkle water/ coconut water to make it absorb the taste of jaggery and fresh coconut.
In some parts of kerala, milk is used to prepare aval nanachatha, I love the taste of black coffee in aval nanachatha.
Ingredients for Aval Nanachatha- Sweet Poha with coconut
- Flattened rice/ Aval/ Poha: 3 cups
- Fresh coconut : 1 cup ( grated)
- Jaggery: 1 cup ( grated)
- Black coffee / Coconut water: 1 cup ( at room temp)
- Elaichi / Cardamom: 2 nos ( powdered)
Procedure for preparing Aval Nanachatha- Sweet Poha with coconut:
Method:
- Sift the flattened rice to remove any small powdered particles.
- In a wide vessel add flattened rice, grated coconut, grated jaggery, powdered cardamom and mix well.
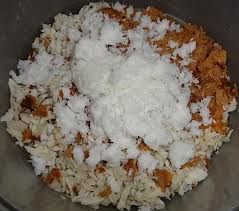
- Sprinkle water / coconut water or black coffee (kattan kapi) and mix the ingredients. The mix should not become soggy, it should remain as sweetened flakes.
- Mix and serve. People do serve this with small banana.Prepare this instantly and serve .The longer you retain it will become soggy and the crispness of atuluku will go away.
- If you are using the kerala poha i.e thick and red variety you will have to sprinkle lukewarm water / black coffee / milk.
My mom used to chop banana as slices and serve aval nanachatha when we were kids. Now I follow that practice for my kids.
The combination of fresh coconut and grated jaggery is loved by kids and elders and usually my kids will grab from the plate immediately after they get to know something new is being prepared in the kitchen. They will make multiple rounds to see the progress. Their senses for smell is perfect (as Madhuri Dixit says in Jhalak Dikla jaa-TV prog) and they will come sniffing from their respective study rooms more so, if they are studying. I repeat this because you will not get them during play time or TV time.
You can try this recipe with sugar too if jaggery is not available. This is an easily digestible, healthy snack and can be made in no time. Give a try for evening snacks today.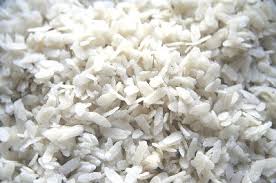
I’m planning to prepare aval vilayichatha some time shortly. There are plenty of recipes with aval : Atukulu laddoo, Fried Atukulu and so on.
In winters you can have it with hot chukka kapi and brighten your mood.
Try this recipe and enjoy healthy cooking. For more healthy and tasty recipes visit our Facebook page and Google+ page


