BREAD SANDWICH
June 26, 2013 by admin
Filed under Breakfast recipes, Snacks & Salads
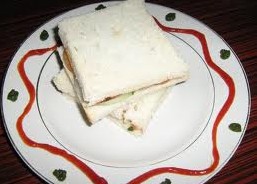 Bread sandwich is a popular snack be it home or during an outing. What I like about it is the hygiene part. The sandwiches available at shops are usually covered in a nice cover and it makes it more irresistible.
Children love bread sandwich and is ordered mostly during Interval time during a movie along with chips, popcorn or a cool refreshment drink , etc. It is a filling snack and enjoyed by people of all ages.
Bread sandwich can be packed for school snacks. Convenient during travel too.
Now that the school had started and the rains have commenced. You can give an option for your kids.
You can make tasty bread sandwiches at your home. Just follow this simple recipe and give your family a huge surprise during snack time in the evening.
Serves – 4
Ingredients:
Bread : 12 slices
Cucumber : 1 large and tender( peel and cut into thin slices)
Cheese : 4 slices
Butter : 8 tsp ( as required / optional)
Salt and pepper powder (to taste)
For chutney:
Mint leaves / Pudinah leaves : ¼ cup
Coriander leaves / Kothmir : ½ cup
Lime juice – ½ lime
Green chilli: 2 medium size
Salt: to taste
Water : 2 to 3 tbsp ( for grinding)
Procedure for Bread Sandwich:
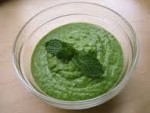
- Wash leaves and green chilli. Drain water completely. Chop it to medium pieces. Grind in mixer along with lime juice, water and salt. Divide paste into 8 equal portions.
- Butter 8 slices of bread and place it on a plate with buttered side up.1 tsp per slice of bread.
- Spread chutney on both sides for 4 slices of bread .
- On a plate arrange the bread sandwich in the following sequence.
- Bread slice with butter on top side, spread 4 to 5 cucumber slices.
- Sprinkle some salt and pepper powder.
- Place a cheese slice over it.
- Now place the bread slice with chutney on both sides.
- Place 4 to 5 cucumber slices. Sprinkle some salt and pepper powder.
- Place the bread slice with butter side down. This is the last layer.
- Cut the 4 edges of the bread carefully with a sharp knife.
- Cut the sandwich with a knife into 2 halves-shape of triangles.
The sandwich will look and taste just like the one you buy at your favorite bakery or snack shop. You can bring in variations in chutney by adding sesame seeds/ peanut chutney
Your kids will also enjoy with tomato sauce. Add your creativity , include smiley faces with sauce on the serving plate.
There are various variations to bread and you can experiment by adding tomato slices / onion slices / salad leaves / boiled egg etc.
Make vegetable cutlet with the bread edges known as bread crumbs.
Go ahead and try this popular snack.
BABY CORN KORMA
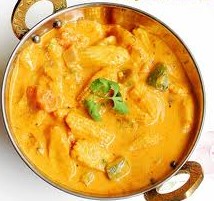 Baby corn Korma is a great side dish along with Chapathi / pulka and Fried Rice. Children love the crunchy taste. A popular dish in functions and occasions too.
Baby corn has become very popular and is available in local markets too. Baby corn has several health benefits:
- Low in calories , low in cholesterol
- High in fiber content
- High in Vitamin B- folate and is a good source of nutrients like potassium, Vitamin C, riboflavin, etc.
- Contains complex carbohydrate which provides a steady stream of energy throughout the day
Confused as to what to cook when you have an unplanned guest for meals or when you are bored with the routine cooking . Try Baby corn korma , a delight to your cooking and also provides nutritional benefits.
Serves – 4
Ingredients:
Baby Corn: 15-16 nos
Red chilli powder : 1 tsp
Turmeric powder: 1/4 tsp
Garam Masala Powder: 1/2 tsp
Ginger garlic paste: 1tsp
Oil: 2 tsp
Salt : to taste
Milk: ½ cup
For Grinding:
Onions: 1 Big (fry in oil till translucent)
Tomato: 2 medium
Green chilly: 3 medium sized ( 1 inch pieces)
Grated coconut: ¼ cup
Cashew nut: 12 nos ( grind with little water separately)
For tempering:
Curry leaves: 2 tablespoons (finely chopped)
Bay leaf : 1 medium size
For garnishing:
Coriander leaves: 2 tablespoons (finely chopped)
Procedure for Baby Corn Korma: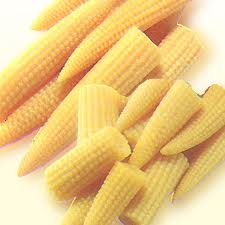
- Wash baby corn and drain water. Cut baby corn into desired size and pressure cook for 2 whistles along with ¼ cup of water.
- Fry chopped onions in a kadai. When cool grind with tomato, green chilly . Keep it aside.
- Grind cashew nuts along with grated coconut and keep it aside.
- Heat oil in a kadai. Temper with bay leaf and curry leaves. Reduce flame.
- To this add ginger garlic paste and the first set of grinded paste. Saute well.
- Add Red chilli powder, turmeric powder, garam masala powder, salt and mix well.
- Close the kadai with a lid. Continue cooking on low flame. Mix in between intervals to ensure the korma mixture does not get burnt at the base of the kadai.
- When the mixture starts leaving the sides of the dish , add cashewnut paste. Mix well.
- After 3 to 4 mins add cooked baby corn along with the water in which the baby corn was cooked. When the curry comes to a boil, add milk gradually.
- Keep stirring the korma curry on low flame to ensure milk does not split .
- Put off the flame. Garnish with coriander leaves.
- Baby corn korma curry is ready to serve with Chapathi / Pulka or Vegetable Fried rice.
Options:
- You can add cubed paneer in the curry along with cashew nut paste. Follow the procedure as mentioned above.
- Paneer is a good combination. It brings variety to the korma preparation. You can name it Baby corn Paneer korma recipe.
Great side dish . A must try recipe for chapathi and pulka.
CURD RICE for TRAVEL / PICNICS and LUNCH BOX
June 3, 2013 by admin
Filed under Rice varieties
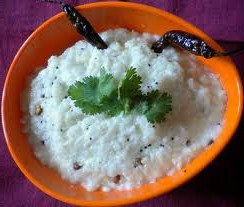 Curd Rice or Yogurt rice is very popular in South India. There is no meals or a festive occasion without curd or curd rice in the menu. This is a cooling dish and ideal during travel. You can prepare this for your lunch box or probably when you are out on a picnic. Curd rice is not spicy and therefore a hit among kids too.
The preparation of curd rice is easy and involves less time too. Curd rice is commonly prepared by mixing thick curd into cooked and cooled rice and add seasoning over it. Curd rice is prepared as Daddojanam or Thayir sadam and garnished with pomegranate seeds. It looks colorful and taste good too. Curd rice is filling and therefore appropriate for travel.
I remember the initial days when I was not aware of the preparation and sent curd mixed with rice and seasoned in the lunch box of my kid in kinder garden. I received a written communication from the school teacher. The teacher had given feedback regarding the sour smell and my son refusing to have the lunch box. I was embarrassed, but made it a point to thank her personally for her inputs and support.
I then took a decision to learn the preparation of tasty curd rice and based on my friend’s tips got to learn the recipe which is suitable for picnics, travel and lunch boxes. Now that I’m good at it I do not mind preparing curd rice when there is a need for my friends too. My family too likes it when we are veg diet days.
The method prepared in this recipe is plain and can be served with mango or lime pickle
Serves – 4
Ingredients:
Cooked Rice : 2 cups
Milk : 600 ml
Curd: 3 tbsp
Salt : to taste
For seasoning:
Red chilly: 1 no
Green chilly: 2 medium sized ( 1 inch pieces)
Mustard seeds: ½ tsp
Cumin seeds ( Jeera) – ½ tsp
Ginger: 1 inch piece (finely chopped)
Curry leaves- 1 sprig ( finely chopped)
Hing ( Asafoetida) : a generous pinch
Oil: 2 tsp
For garnishing:
Coriander leaves: 2 tablespoons (finely chopped) optional
Procedure for CURD RICE:
- Cook rice with a little extra water such that the rice is a little soft. Allow the rice to cool to room temperature.
- Boil milk and bring it to room temperature. Add milk and salt to the cooked rice. Mix well.
- Add curd to this and mix the rice thoroughly.
- Ensure the level of milk is 1½ inch above the rice.
- Pour oil into a kadai. When hot add mustard, green chilly, red chilly, jeera, ginger, curry leaves and finally hing to it.
- Pour the seasoning into the mixed rice. Mix thoroughly such that the flavors of ginger, chilly, hing gets into the milk and finally to the curd rice.
- You can transfer the curd rice mix into an air tight container like Tupperware or SS tight fit boxes.
- Garnish with coriander leaves prior to closing the lid.
There is no assurance that the coriander leaves will remain on top of the box when you open. Since you are travelling the container will shift with each pot hole on the road or while transferring the luggage. Any way enjoy the curd rice on your journey. If you prepare this recipe for lunch box, you are going to get great feedbacks from your kids and their friends. Get prepared.
Quick tips:
- Ensure an extra layer of milk on top of the rice if there is a good gap between preparation and the actual consumption. The main difference between instant curd rice and the curd rice prepared for travel is the quantity of milk over the layer of rice as it helps ferment and the end result…tasty curd rice.
- Transfer the curd rice mix into an air tight container to avoid spilling . Extra caution, place the container in a poly bag and then into the travel bags. Your efforts will not go in vain.
- In colder climates you will have to add an extra spoon of curd for sufficient fermentation.
- There are various ingredients that go well with curd rice. Add chana dhal, urad dhal in the seasoning. Add fresh coconut pieces or black pepper along with rice, prior to seasoning.
Nutritional and health benefits provided by curd or yogurt
 - Helps improve the digestion.- Helps strengthen the immune system.- Consuming curd increases the capacity to absorb the nutrients and mineralsfrom other food stuffs.- Helps get strong bones and teeth as its calcium content is high. It helps fight against osteoporosis.- Helps minimize the risk of high blood pressure.- If you have high cholesterol, consuming curd will help you.- Curd helps to increase the quality and quantity of semen.
RAGI DOSA
May 27, 2013 by admin
Filed under Breakfast recipes
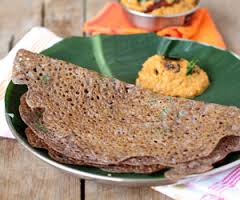 Ragi Dosa is a healthy breakfast option on holidays when you have time to serve your family hot crispy dosas. Ragi dosa is a wonderful evening meal too. Ragi or Finger Millet is high in dietary fibre, calcium and iron. Ragi is gluten free, easily digestible with an earthy, nutty flavor. In South India during Summer season, Ragi is included in various dishes and is ideal during summer season.
Ragi dosa is an instant preparation with all ingredients easily available in the kitchen. Just give a try to this dish and I’m sure your attempt will be appreciated.
Ragi flour is available in packs at your nearby retail store. The dosa has a deep brown color and therefore the chutney you serve should be in contrast color red (red chilli chutney) or orange- tomato chutney.
Serves – 4
Ingredients:
Ragi flour : 1 cup
Semolina / B.rava:1 cup
Maida: ½ cup
Rice flour / Wheat flour: ½ cup
Butter milk : 1.5 cup
Green chilly: 2 nos (finely chopped)
Onions: 1 medium size ( finely chopped) – optional
Coriander leaves: 2 tablespoons finely chopped
Curry leaves- 1 stem finely chopped
Cumin seeds ( Jeera) – 1 tsp
Ginger: 1 inch piece finely chopped
Salt : to taste
Water: as required to maintain batter consistency
Cooking Oil for dosa frying.
Procedure for RAGI DOSA: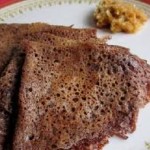
- Add all the ingredients except oil into a large bowl . The ragi dosa batter should be free flowing, no lumps and the consistency should be running as similar to thick buttermilk.
- Place a dosa pan / tawa on the stove, when hot do the water test i.e sprinkle drops of water on the tawa, the water will sizzle on the pan with heat.
- Maintain medium flame for proper cooking of ragi dosa.
- Apply oil on the tawa. Pour the batter in a circle at the edges of the pan. Then gradually fill the centre by spreading the batter gently in the gaps.
- After 2 -3 minutes turn the dosa for cooking on the other side.
- Dosa is ready and can be served along with spicy chutney or podi of your choice.
Quick tips:
To evenly spread the oil on pan I cut the onion into half. I hold the tail portion / stem of the onion and dip the flat end in a cup containing oil. I apply the flat end of onion with oil on the pan for uniform spread of oil.
If the batter is catching on the tawa, the decrease the flame .I used ghee on the batter prior to setting of 1st side. You can sprinkle grated carrot and chopped onions after spreading the batter. My children enjoyed the crispy dosa with mint chutney or tomato chutney.
MASALA EGG OMELETTE
April 23, 2013 by admin
Filed under Breakfast recipes
 Egg omelette is a quick and tasty dish in the menu. Loved by people of all ages at any time of the day. Teenagers experiment cooking usually with simple recipes and omelette is the preferred choice. Basic preparation of egg omelette involves salt, onion and pepper . Here is a trendy variety in the egg brand.
Sure you are going to enjoy this variety – Masala Egg Omelette
Ingredients:
Eggs : 4 nos
Onion: 2 medium finely chopped
Green chillies : 2 ( finely minced)
Black pepper powder : ¼ tsp
Turmeric powder : 2 pinches
Garam Masala powder : ¼ tsp
Milk : 2 tbpns
Coriander leaves: 2 tbsps ( finely chopped)
Oil : 3 tbsps
Include vegetables(optional): Carrot , Capsicum , Tomato – 3 tbspn of each vegetable ( finely minced ) or shredded chicken : 3 tbspn
Salt ( to taste)
Procedure for Masala Egg Omelette:
- Beat the eggs in a bowl till foamy. Add all the ingredients except oil and mix well.
- Heat the pan. When hot , spread oil in the pan. Reduce flame and pour half of the omelette base onto pan. Swirl the pan such that the omelette base spreads over.
- Cook on medium flame till one side is brown.
- The centre will be liquidy therefore be careful while flipping omellette on the pan. With a ladle gently flip over and cook the other side for another minute.
- You can add grated cheese on the omelette , the heat of the omellette will lightly melt the cheese.
- The masala egg omelette has cooked and is ready to serve.
- Transfer the masala egg omelette onto a plate and serve with bread , buns or chapathis.
- Prior to making the next omelette, mix the omelette base well and pour.
- Maintain low flame to avoid burnt smell of omelette.
Your family will ask you make more of this tasty omelette. Enjoy…
MORINGA LEAVES TORRAN
April 15, 2013 by admin
Filed under Curries, Rice & Chutney Varieties
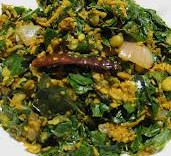 Drumstick plant leaves are an excellent source of nutrition and natural energy booster. Drumstick tree leaves are commonly called Moringa leaves . Moringa leaves are a power house of nutrients. Moringa flowers and buds are also used for cooking along with leaves.
A simple side dish recipe with moringa leaves, flowers and buds. Serve with hot rice or chapattis.
Ingredients:
Fresh moringa leaves : 2 cups . Include flowers and buds too
Onion : 1 medium (chop to fine pieces)
For grinding:
Fresh coconut (grated) : ½ cup
Green chilly : 2 nos ( cut lengthwise), Garlic pods: 4 nos, Cumin seeds ( Jeera) : ¼ tsp
Turmeric powder: ¼ tsp
Grind all ingredients in a mixer coarsely
For seasoning
Cooking oil : 2 tsp , Mustard seeds : ¼ tsp, Rice (uncooked) :2 tsp, Curry leaves : 1 stem
Salt ( to taste)
Procedure for Moringa leaves torran:
- Wash the moringa leaves, flowers and buds and place in a sieve to drain all water.
- Heat oil in a flat bottom pan, season with mustard seeds, rice and curry leaves.
- Add onion, when translucent add the Drumstick plant leaves, flowers and buds.
- Saute and steam cook on a low flame.
- Add salt and the grinded coarse paste. Mix thoroughly till it is of dry consistency.
Coconut relieves the bitter taste of the leaves and is a good combination with rice or hot pulkas.
Usually in Indian dishes seasoning includes dhals but for Moringa leaves dishes rice is used. Rice becomes white and crispy when fried in oil.
Mineral Contents in Drumstick Leaves
- Vitamin A — Four times as in Carrot.
- Vitamin C — Seven times as in Orange.
- Potassium – Three times as in Banana
- Calcium – Four times Calcium as in Milk.
- Protein – Two times Protein as in Yogurt.
Enjoy various ways to include the leaves and vegetable in your diet. Stay healthy.
TOMATO CHUTNEY
October 12, 2012 by admin
Filed under Chutney varieties, Curries, Rice & Chutney Varieties
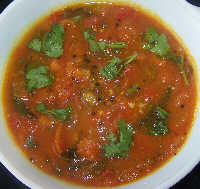
Tomato Chutney is also known as Tamatar ki chutney. Famous and a favorite chutney among South Indians. A good combination with rice, khichdi etc.
Ingredients:
6 to 8 large cloves garlic (finely chopped )
1/4 cup onion (finely chopped )
2 dry red chilies, soaked
1 cup tomatoes, finely chopped
1 tbsp coriander finely chopped
1 tsp oil
salt (to taste)
Procedure of Tomato chutney
- Drain the soaked chillies and chop them finely.
- Heat the oil, add the onions and garlic and sauté over a slow flame for 4 to 5 minutes till they are lightly brown.
- Add the chillies and salt and sauté again.
- Add the tomatoes and cook for 10 to 12 minutes over a slow flame till the tomatoes are soft and can be mashed lightly.
- Cool completely and add the coriander leaves and mix well.
- Serve tomato chutney with hot rice or khichdi
PEANUT CHUTNEY
October 12, 2012 by admin
Filed under Chutney varieties, Curries, Rice & Chutney Varieties
Peanut Chutney is popular chutney among South Indians. A good combination with Idli, Dosa, etc.
Ingredients:
1/2 cup peanut (Groundnut / Moongfalee )
¼ cup coconut (fresh grated)
3-4 green chilies ( diced)
1 small onion (medium) finely chopped
few coriander leaves
1 tsp cumin powder (jeera)
3 tbsp jaggery (gud)
¼ tsp mustard seeds ( rai)
2 dry red chilli
Salt (to taste)
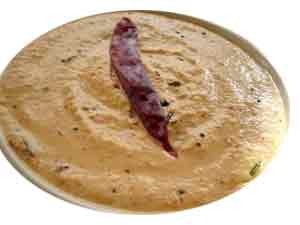
Procedure of Peanut chutney:
- Fry peanuts and remove the skin.
- Heat oil in a pan, add green chilies, cumin seeds, garlic , onions. Sauté over low flame. Keep aside to cool.
- Grind together peanuts, coconut, salt, jaggery and the fried ingredients to form a coarse paste.
- Season with mustard and dry red chillies. Spread this on the chutney.
- Add lemon juice prior to serving.
MINT CHUTNEY
October 12, 2012 by admin
Filed under Chutney varieties, Curries, Rice & Chutney Varieties, Featured
Mint Chutney is a favourite chutney among South Indians. A good combination with Idli, Dosa, Bonda, bajji’s etc.
Ingredients:
1 bunch fresh mint leaves (pudinah)
2 green chillies
1 tbsp tamarind pulp
Little water
Salt (to taste)
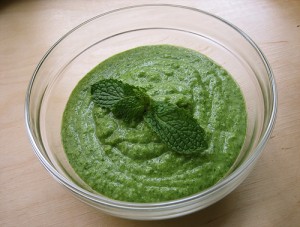
Procedure of Mint chutney:
- To make tamarind pulp, soak little tamarind in water and keep aside for 2 hours.
- Then strain the mixture in a bowl with the help of a spoon. To make tamarind juice add little water to the pulp.
- Wash the mint leaves well.
- Grind it to a smooth paste with green chillies, salt and tamarind juice.
- You can add water if the mixture is thick.
LIME RICE
October 10, 2012 by admin
Filed under Curries, Rice & Chutney Varieties, Rice varieties
Lime Rice is a sour South Indian dish. Ideal for meal packs during travel too.
Ingredients:
2 cups Rice
2 lemon (extract juice)
6 tbsp Oil
½ tsp Black Mustard seeds
Few curry leaves
3-4 green chilies
1/4 tsp. turmeric powder
1/4 cup peanuts
Salt (to taste)
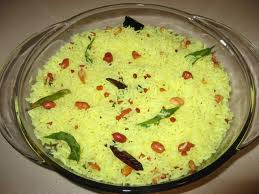
Procedure of Lime rice:
- Pressure Cook the rice and spread on a plate, keep aside. Mix lime juice and salt to the rice and keep aside.
- Heat oil in a pan and add mustard seeds, allow to splutter.
- Add peanuts, fry till brown.
- Now add green chilies, curry leaves, turmeric powder and fry for 2 minutes.
- Switch off the stove and add this to the boiled rice mixed with lemon juice. Mix well.
- Lemon rice is ready to be served.
- Can be taken with tomato chutney or pickle.